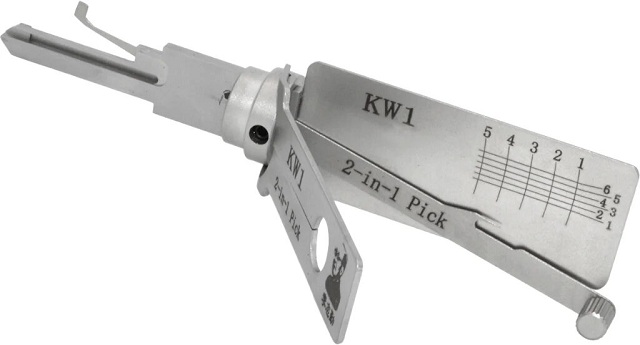
How to Use the Lishi Tools KW1 2-In-1 Pick
2024-06-14 13:56
The Original Lishi Tools KW1 2-In-1 Pick is unique and used differently from its automotive counterparts. It functions more like a standard lock pick and should be used accordingly. Due to its delicate design, never force the lifter tip if a pin is difficult to move.

This step-by-step guide ensures reliable service from your Lishi ToolsKW1 2-In-1 Pick and helps avoid damaging its fragile design.
Note: While you can use the KW1 2-In-1 Pick on Kwikset SmartKey locks, it is risky. Forcing the tool into the SmartKey lock or applying too much pressure can damage its delicate design. The KW1 is mainly designed for five-pin locks with KW1 keyways using cylindrical pins. Using it on SmartKey locks requires great care and is not recommended.
Failing to follow proper procedures or using excessive force can avoid the KW1 warranty.
Step 1: Cleaning the Kwikset or Compatible Lock
Before using the Original Lishi KW1 2-In-1 Pick, properly prepare the lock. A dirty or contaminated lock can damage the tool, especially the delicate lifter tip. Follow these instructions to prepare the lock:
1. Spray cleaner into the lock’s keyway to remove dirt or debris.
2. Run a KW1 key blank in and out of the lock about 25 times to exercise the pins and springs.
3. Spray lubricant into the lock’s keyway to lightly lubricate the tumblers. Silicone is recommended as it doesn’t leave residue.
4. Again, run a KW1 key blank in and out of the lock about 25 times.
5. The lock is now ready for the KW1 2-In-1 Tool.
Step 2: Inserting the Pick
Correctly inserting the KW1 2-In-1 Pick is crucial for successful picking and avoiding damage. Follow these steps:
1. Grasp the KW1 2-In-1 Pick.
2. Move the lifter arm down so the tip is below the top of the tool.
3. Pull the lifter arm to the rear to protect the lifter tip inside the tool tip.
4. Ensure the tension arm is fully closed.
5. Hold the pick so the tension arm remains closed and the lifter tip is at the bottom of the pick’s tip.
6. Carefully insert the KW1 into the lock’s keyway. If you feel resistance, withdraw the pick and check that the lifter tip is properly positioned. Try inserting again. If it still won't enter, do not force it. Check for obstructions or deformities.
7. If needed, gently rock the tool tip to guide it into the keyway.
8. Ensure the pick is fully inserted with the pick’s shoulder against the lock plug.
Step 3: Picking a Lock with Standard Cylindrical Top Pins
Before picking, understand that the KW1 is not for forcing pins into the bible of the lock. It operates more like a hand pick. Pay attention to the tension applied.
Vary the tension to gently move the lock pins into the bible without forcing them. You may need to loosen the tension for stubborn pins, which might require repicking some pins. The lifter arm tip is delicate and should be used gently to move pins into place.
For locks with spool pins, see Step 3A below.
Follow these instructions to pick the lock after inserting the KW1 pick:
1. Gently open the tension arm.
2. The picking direction depends on the lock. Some locks pick more easily counterclockwise. You may record pin depths when picking counterclockwise, then use these as a guide for clockwise picking.
3. Some locks pick more easily starting at cut 1, others at cut 5. Start where pins move more easily. Apply light turning tension and move the lifter arm until the pin sets, indicated by a slight click. If picked, the lifter arm will bounce slightly.
4. Repeat until all pins are set and the plug turns.
Step 3A: Picking a Lock with Spool Pins
When picking spool pinned locks, vary the tension to gently move the pins into the bible without forcing them. Loosen tension for stubborn spool pins, which may require repicking some pins. The lifter arm tip is delicate and should be used gently.
Spool pin locks can cause a "false set," where the plug rotates slightly and then stops. If this happens, rotate the plug back and adjust tension to avoid a false set. Practice will help you gently work the spool pin without a false set.
Follow these instructions to pick the lock:
1. Gently open the tension arm.
2. The picking direction depends on the lock. Pick counterclockwise, record pin depths, then pick clockwise using these depths as a guide.
3. Start at the end where pins move more easily. Apply light turning tension and move the lifter arm until the pin sets, indicated by a slight click.
4. Repeat until all pins are set and the plug turns.
Step 4: Reading the Pin Heights
After picking the lock, the bottom pins are trapped in the rotated lock plug, and the top pins are trapped in the bible, allowing you to read the pin heights. Follow these steps:
1. Insert the KW1 into the keyway (see Step 2).
2. Pick the lock (see Steps 3 or 3A).
3. Ensure the tension arm is open.
4. Starting at cut 1, move the lifter arm until it stops on the pin.
5. Record the depth.
6. Repeat for all cuts.

 Like Us on Facebook to enjoy 5% discount